Age When We Did This Activity: 19, 20, 23 months
Materials:
- Tempera paints
- Water
- Art Board, Kraft paper
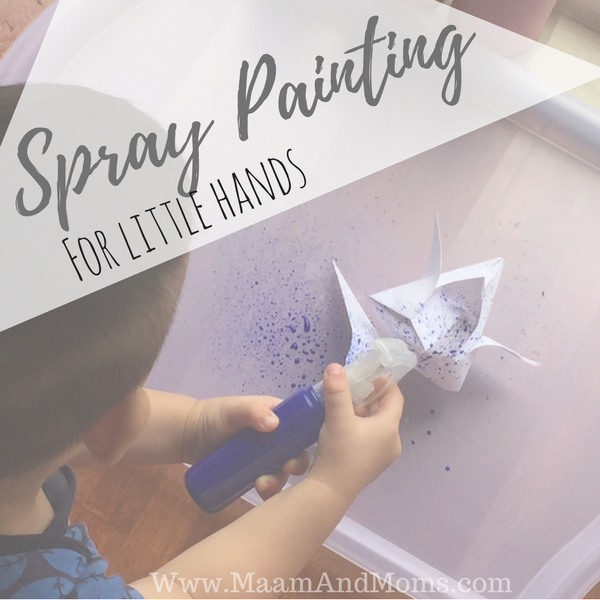
- Trigger Spray (ideally 1 per color) I like this because Little P can work on it independently without my help. The size is very manageable for his little hands.
Preparation:
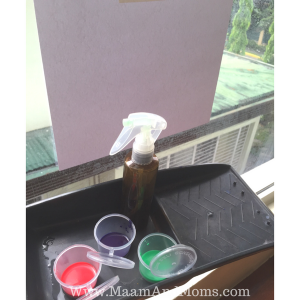
- Ma’am and Mom’s Tempera paints are thick so you’ll have to dilute them. I always start with 1:1 ratio, shake it well and test out the spray. The more water you put, the lighter effect you’ll get.
- Prior to our painting sessions, I would usually ask Little P the colors that he’d like to use. I limit the colors to 3-4 only.
- Ideally, use one trigger spray per color to avoid having to change the content of the sprayer.
- Toddlers don’t have much control yet so it would be easier for them if they spray on a paper in front of them rather not than on a table or floor.
How did it go for us?
We’ve spray painted countless times but here are our highlights:
- SPRAY PAINTING ON AN ART BOARD which became the cover of a birthday card we gave to my aunt.
This was the setup when I first made Little P try spray painting. We only had 1 spray then. I transferred the paints as we went along. I won’t recommend this approach though. It’s time consuming and disrupted his focus.
I felt excited seeing him spray independently. It was the perfect size! It’s a great fine motor activity! There were times his little hands would slide off to the tip of the trigger but things got easier as his little hands grew!

After spraying with different colors, here’s our product! You’ll notice that the colors are very light but it was actually the shade that I was hoping to achieve for this birthday card cover.
2. SPRAY PAINTING on a Kraft paper that we used as a gift wrapper
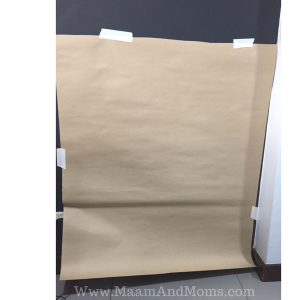
Since we were going to make a gift wrapper, I used a whole sheet of Kraft paper and taped it on our wall. I prepared several tools like the brushes, foam brushes, and sprays.
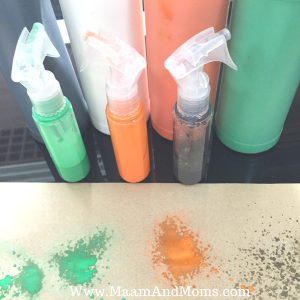
This time around, I bought more trigger sprays! 1 prepared 1 for each color that little P chose. I tested out if it’s the shade that I wanted. Remember: more water, lighter shade. Lesser water, darker shade.
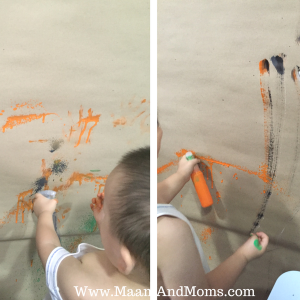
When the painting session began, he used the tools I prepared alternately. I made him try spraying close to the paper and far from the paper.
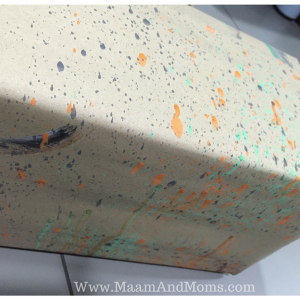
Amazing results right? I always believe that art should be a process over product thing but this time around, both the process and product turned out beautiful!
3. SPRAY PAINTING on origami tulips to be given to 4 different loved ones. We just love giving out gifts made with love!

Like before, I asked little P to choose colors, then I prepared the mixture. We used a tray to make clean ups manageable.
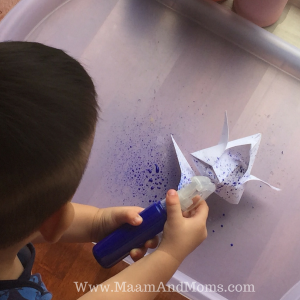
He sprayed the first tulip but stopped right away so I just left the rest on the floor in case he gets in the mood to spray again. I didn’t want to force him especially with artworks because it’s counterproductive.
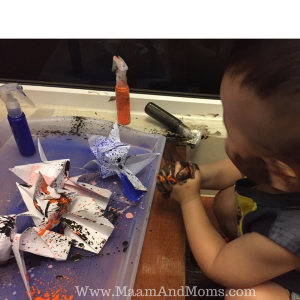
Come nighttime, he wanted to spray again! Yehey! This time, he was so engrossed that he didn’t want to stop spraying! He sprayed everywhere ? Good thing our paints are easily washable! After he painted, I just quickly wiped the window, floor, and jars around using a damp rag.
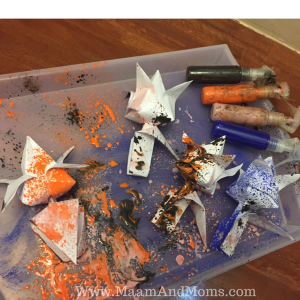
We made the tulips dry overnight
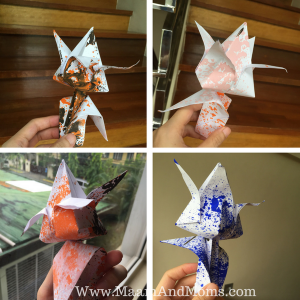
Then voila! The finished products!
That’s it! Spray painting has been our go to tool when we need to produce some designs. It’s so easy to use and at the same time a great and fun fine motor practice to strengthen those little hands for future writing. On some days, sprays are used for cleaning and watering the plants!
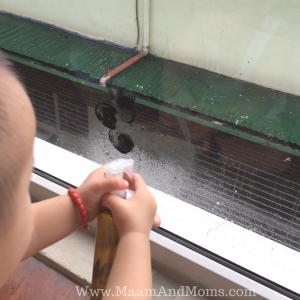
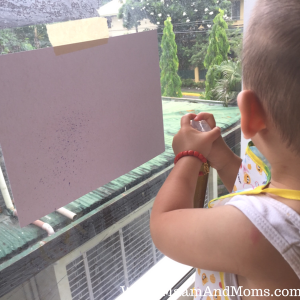
When we feel like it, we just paint directly on our window then clean afterwards! That’s art activity, fine motor practice, and practical life work rolled into one!
What to Expect:
Because it’s so fun using the trigger spray, the child may not be able to always keep spraying within the paper. It’s ideal to do spray painting in the bathroom, outdoors or in our case near our window. Everything around this area is pretty easy to clean. ?