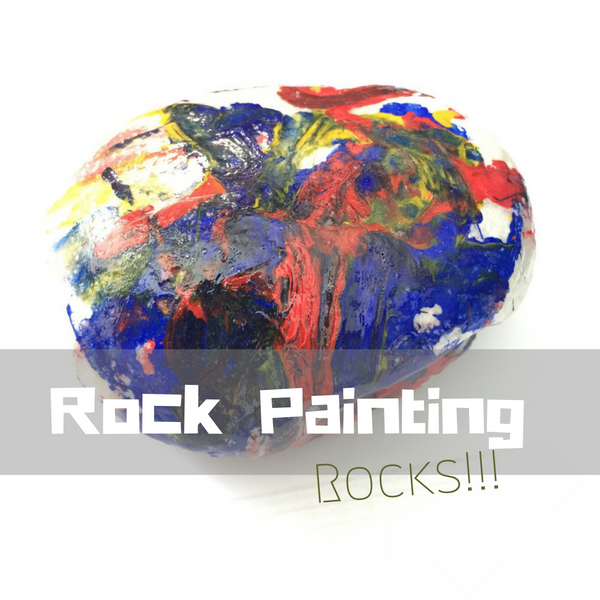
Gifts made with love are the sweetest! These two months we were celebrating his uncle’s birthday and also Father’s Day so I decided to let Little P paint on rocks which can be used as paperweights.
Age when we did this activity: 18 and 19 months
Materials:
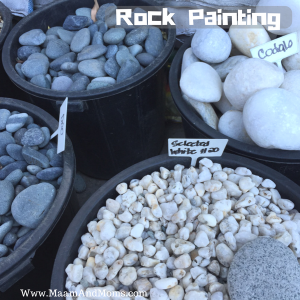
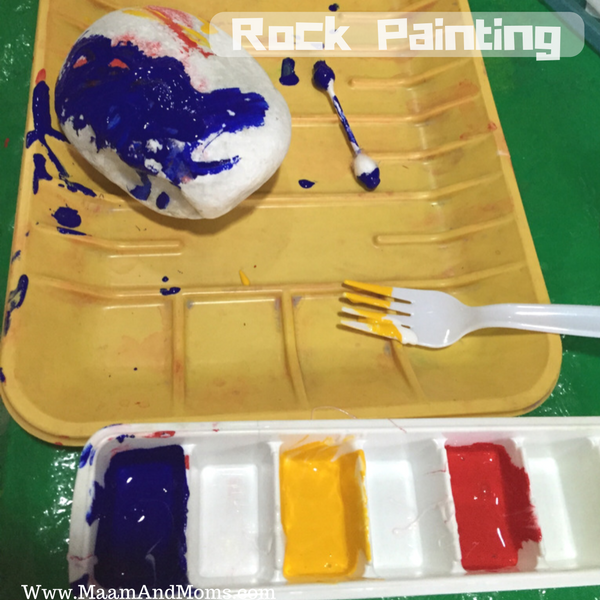
- A rock with rough surface like the “codalo” variant on photo. We got ours at one of the shops selling landscaping goods along white plains

- Ma’am and mom’s Tempera Paint
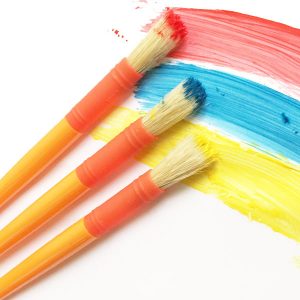
- Painting tools – for our first project we used cotton buds and fork. For our second: we used squeezable bottles, round tip foam brush, and little artist paint brush
- Another paint brush for waterproofing the painted rock
- Paint palette. We used our ice tray from Japan homes.
- Recycled meat tray that will work as your work tray and drying tray. It is better to choose a tray with ridges so that the freshly painted surface is not ruined when you flip the rock to paint the other side (unless you let one side dry before painting the other side)
- Wood glue to waterproof the painted rock
- Wipes for easy clean ups
Preparation:
- Cover table
- for our first rock painting, pour undiluted paint in ice tray
Materials used: Repurposed meat tray, cotton buds, fork, ice tray - for our second rock, pour paint and add few drops of water to make it more flowy. I used only 1 squeezable tube and just quickly washed and changed paint content.

2nd rock painting activity. We explored the use of a squeezable bottle.
So how did it go?
- Just like any other activity, I would set out rules and explain what he’s supposed to do (I didnt make a very specific instruction like how he should exactly paint but simply told him that he will design this rock for his uncle and he can use the tools I prepared for him).
- As he painted, he not only used the cotton buds but also his fingers. He also used the back of the fork instead of just the fork’s teeth. I didn’t correct him. I just allowed him to paint as he wished

He painted the rock using his finger, fork and cotton buds - I offered some suggestions like “do you want to use another color?” If he won’t change paint color then it’s okay. It’s his work after all
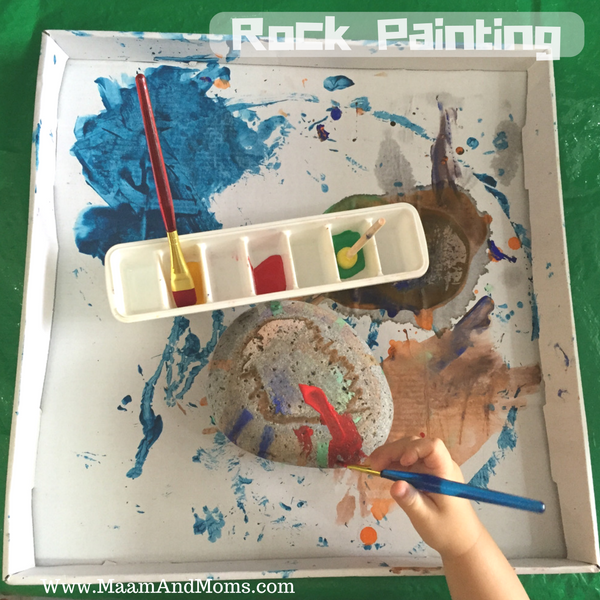
Our 2nd rock painting activity using a smoother rock. - This was a very quick activity. Painting each side of the rock lasted for less than 5 mins only
Flipping and Waterproofing:
- For our first rock, I immediately flipped the rock so he can paint the other side. For our second rock, since the paint was runny, I had to let it dry first before letting him paint the other side.
- Since I want them to last long, we have to waterproof the painted rock. I made him paint the entire rock with wood glue. With this, I had to make a retouch to make sure the entire rock is covered.
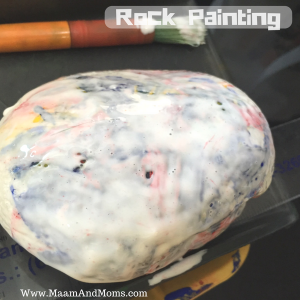
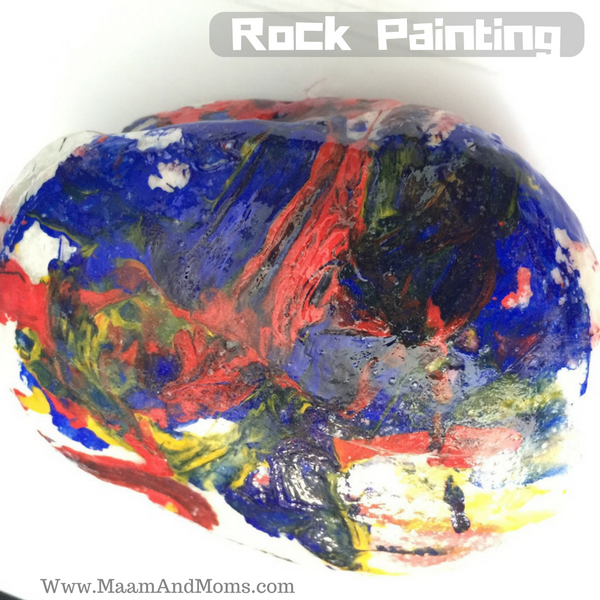
To waterproof the painted rock, we painted it with wood glue - It will look white but once it dries up, it will turn glossy like the photos below.
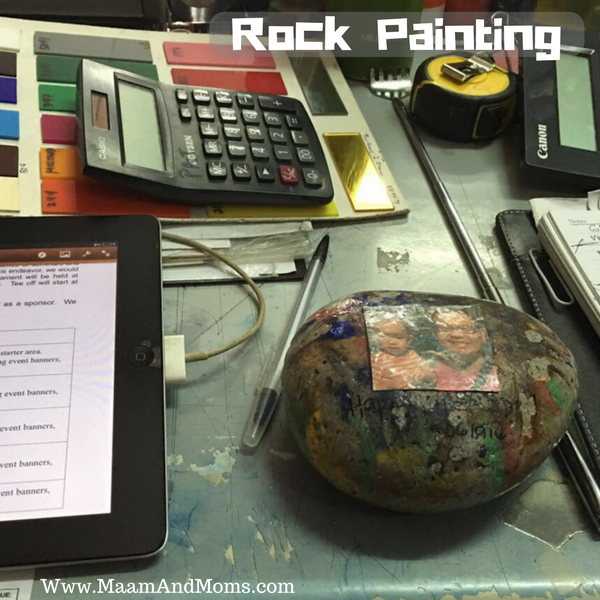
- With out second rock, I printed a photo and included the photo when he coated the rock with glue.
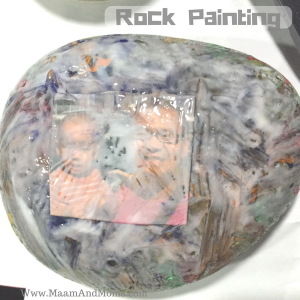
Tape covered paper printed photo on rock
- We made it dry overnight and voila! Gifts ready!
This DIY paper weight was given as a gift to his uncle
What to expect:
it will just be a quick activity but there will be waiting times – waiting for one side to dry up before painting the other side and waiting for the glue to dry up. What can be done is to separate it into 3 activity times: paint in the morning, paint the other side in the afternoon, then paint the glue the following day.
Recommendations:
- use a rock with rough surface. It absorbs paint better than smooth surfaced rocks.
- Expect mess. Even if it’s a rock painting activity, the child will definitely experiment on painting on their body, table, etc. But what’s art without mess right? 🙂
- If you plan to attach a paper printed photo like what we did on our second rock painting activity, applying glue directly on it will make the photo smudge. What I did was to cover the picture first with tape on both sides to prevent it from being soaked.
- Use undiluted paint for darker effects
Will I do this again?
Definitely yes! For our next rock painting, We will once use a rough rock and undiluted paint same as our first rock painting. I will male him use our foam brushes (available here).